
I'm going to pause with the blog posts and enjoy these last few days before Christmas with the kids and family. We have already played Cheerio bingo this morning and had a piece of cranberry bread and some eggnog. I hope you are all enjoying your holiday as well! Merry Christmas!
Tuesday, December 22, 2009
Saturday, December 19, 2009
First Crocheted Hat

While running late for my crochet class last week I dashed to the computer and typed in "crochet hat free pattern", printed practically the first thing that came up and here is what I ended up with. I'm so pleased. It is a little large, but I can fix that on hat number two. The free pattern is here. The pattern is called "Divine Hat". I was surprised how fast this crocheted up! 

Thursday, December 17, 2009
Crochet Snowflakes
 I had great ambitions to make a blizzard of snowflakes for my tree this year... reality hits... reality stinks (sometimes) .... I finished ONE. Yep, JUST ONE! Oh well, I do highly recommend this free pattern (from Bev's Country Cottage)- I think it is really pretty. Oh, and please notice the cute little house ornament in the background that my five year old painted for our tree. I love crafting with my kiddos!
Tuesday, December 15, 2009
Cozy Baby Clothes

My adorable, awesome, amazing (not prejudiced or anything) little grandson is headed on a chilly outing to see the zoo lights. To keep his tiny toes-ies warm I sewed up this McCall's pattern M5963. I improvised on the hat to make the "Santa" version. Isn't he a cutie?! His mom is pretty sweet, too.
Saturday, December 12, 2009
Christmas Tradition
Every year on Christmas Eve we act out the Christmas story. Click on the link at top on the right for a short video of some sweet little children acting out the nativity and for some great ideas for your family.
Thursday, December 10, 2009
More Delightful Decorating Blogs

These blogs show you how to make things to decorate your home with- you'll be amazed! It looks like some of these projects stepped right out of a Pottery Barn catalogue-so wonderful!! Then these jealousy inducing individuals show you how to display your creations in your own home- so not fair how much talent some of these ladies are hoggin'- I guess all is forgiven because they at least share their genius!
My newest favorite is Shanty2chic. If you don't see something that you love at first glance make sure that you scroll back through their projects because they have some handiwork that looks like a million bucks- but only cost a few!
Check out these too, because, well, they are all delightful!
Room to Inspire
Crafty Nest
Just a Girl
Life in the Fun Lane
Livin the Simple Life
Updated 1/28/2010
Learn how to make your own 'Pottery Barn' furniture at Knock off Wood- my husband will be busy for years- but she shares her free plans and says that these projects are easy enough for the timid woodworker.
Not So Idle Hands (has crafts and a sweet adoption story too)
The Shabby Nest
The Lettered Cottage
Enjoy!
Tuesday, December 8, 2009
Christmas List

Have you made your Christmas Wish List? I made a short version with two reality gifts and two fantasy gifts on it. Then today I saw this list over at Amy's Inspireco- amazing! Drool over everything! I can pretty much guarantee you'll have to add a thing or six to your list!!
I adore this coat- would NOT look good on me- but so stinkin' cute!
Monday, December 7, 2009
Don't Like Oreo Truffles

Am I the only one in the world who doesn't like Oreo truffles? I had heard such rave reviews that I made a batch of Oreo truffles and a batch of Nutter Butter truffles. I crushed, mixed, dipped, and tossed- yep, I tossed them cookies (now truffles) right into the trash- And I was so looking forward to all of that chocolate yumminess (sigh).
In other news. The little kiddies created these this week (hurrah for kits)!

And today's craft is another candle. This one made from a CB2 glass candle holder (that looks exactly like a giant ornament when turned around to the back). Click on the above store link and scroll down, click on "room view" for the upcoming chandelier idea.
I also used a dollar tree candle. Wouldn't it be cute to fill these with tiny ornaments, or peppermints. You could make your own candle chandelier that would look something like this.
In other news. The little kiddies created these this week (hurrah for kits)!

And today's craft is another candle. This one made from a CB2 glass candle holder (that looks exactly like a giant ornament when turned around to the back). Click on the above store link and scroll down, click on "room view" for the upcoming chandelier idea.

I also used a dollar tree candle. Wouldn't it be cute to fill these with tiny ornaments, or peppermints. You could make your own candle chandelier that would look something like this.

Just attach cup hooks to a board and hang the board on the ceiling. Then run a small/fine chain (from Lowe's) or strong string through the loop on top of the candle holder and attach to the cup hooks. If you use the little battery flicker lights you could rotate filling the orbs with seasonal goodies- jelly beans, corn candy, Valentine conversational hearts- (wow, sound like sugar is on the brain.... I was REALLY looking forward to those truffles) because you could fill the candle holder with little pinecones, tiny crafted eggs, or mini pumpkin ornaments (all sugar free). Of course, the light fixture looks really cool in an industrial/minimalist kind of way AS IS!
While you are at CB2 you might want to check out these sweet dove ornaments and felt trees.


Friday, December 4, 2009
Snow Village

I started making my little snow village. The girls helped me paint these paper mache houses that I found at Hobby Lobby's 90% off sale (last Christmas). Then we covered them with glue and glitter. They still need a few touch ups- doors, etc. but that will have to wait until next year- we'll just enjoy them how they are for now. The little trees were a steal from a yard sale (last year). I bleached them and dyed them and added glitter and tiny ornaments- fun stuff.
Happy day! We had three inches of snow last night so today is a snow day (this is a big snow for Texas)... yipee! No school. Sounds like a good day to make fudge and watch Christmas movies!
Tuesday, December 1, 2009
Ragged Edge Quilt

I finished my first ragged edge quilt and I learned a few things! First off, if you are going to make a ragged edge quilt...don't cut out the squares while you watch a movie because you will need your brain to remember that the selvaged edges won't fray... so don't cut out all of your squares thinking that the selvaged edge will be in the seam allowance... because it won't be... and you'll be left without enough fabric to re cut them... ugh.
I also learned to always use Hobb's heirloom premium batting and not the stuff (sew perfect batting) that is on sale and lumps up the first time you wash it- so, not cool after all of that work!!
My last tip for the day is- prewash your bright pink fabrics so that they don't run all over your pristine white material... oops! I know... I know... you are always supposed to prewash... but some rules are so confining and it is easier to work with the fabric with the chemical sizing stuff still in it... but, live and learn... maybe :o) Anywho, I used 12", 9", and 6" squares. The fabric is mostly Grand Revival by Tanya Whelan. You just cut out your squares and zig zag them onto the top of another piece of fabric until you have all of your blocks. Then zig zag your blocks onto a large piece of fabric. This is a baby quilt so it only took six blocks with some edging. Hope you learn from my brainless bloopers! Have fun!
Monday, November 30, 2009
Make a Nursing Cover

Did you have a delightful holiday?! We had time for some crafting amidst all of the eating, playing games, eating, football and more eating. This little adorable grandbaby is here for a visit and I'm in snuggily, huggable heaven!!
One of the things we crafted was this nursing cover. In the picture my daughter has pushed the cover over to the side to be more comfortable. Of course, you can use it hanging straight down, evenly over your body.
This is super easy to make!!! You'll need mitten/suspender clips that can be found at your fabric store or online at JoAnns.com. They look like this and are very handy!!
Now to get on to business. You'll need:
1 baby blanket
2 mitten/suspender clips, size 1"
1 piece of ribbon 24" long
Test out the ribbon length by safety pinning the clips onto the ribbon- try out your nursing cover a few times, and adjust the ribbon length as needed. Sew clips onto the ribbon and .... you're all done!
If you want to make your own baby blanket you'll need:
2 pieces of fabric 40" x 26" (the fabric I used was from Hobby Lobby)
1 piece of very light batting the same size
2 mitten/suspender clips, size 1"
1 piece of ribbon 24" long (I used grosgrain)
Place your fabric with right sides together.
Place thin batting on top of the fabric.
Sew around the rectangle leaving a six inch opening on one side.
Clip corners and seam allowances about every six inches.
This picture shows the blanket with the cream batting on top. It is ready to turn right side out.
Turn your blanket right side out.
Sew 1/4" seam top stitching around the entire rectangle- making sure to catch the edges of the six inch opening.
Fold ribbon ends under once and attach to mitten clip (test out the ribbon length as mentioned above).
Quick and easy. My daughter opted against the traditional boning used to hold the top of a nursing cover open as she wanted something that would lay flat against her.
You can remove the clipped on ribbon at anytime and you'll have another baby blanket (I'd suggest removing the clipped on ribbon to prevent any type of choking hazard).
Enjoy!
Thursday, November 26, 2009
Enjoy the Day
Happy Thanksgiving!! I am so very blessed. Today is the perfect time to say a special prayer thanking God for the bounteous blessings He gives to me.
Monday, November 23, 2009
More Dollar Tree Candles


Two more versions of the Dollar tree candles. These are obviously for Christmas. One vase is filled with jingle bells and the other with hard candy. I found the hard candy and large jingle bells at Dollar Tree too.
Friday, November 20, 2009
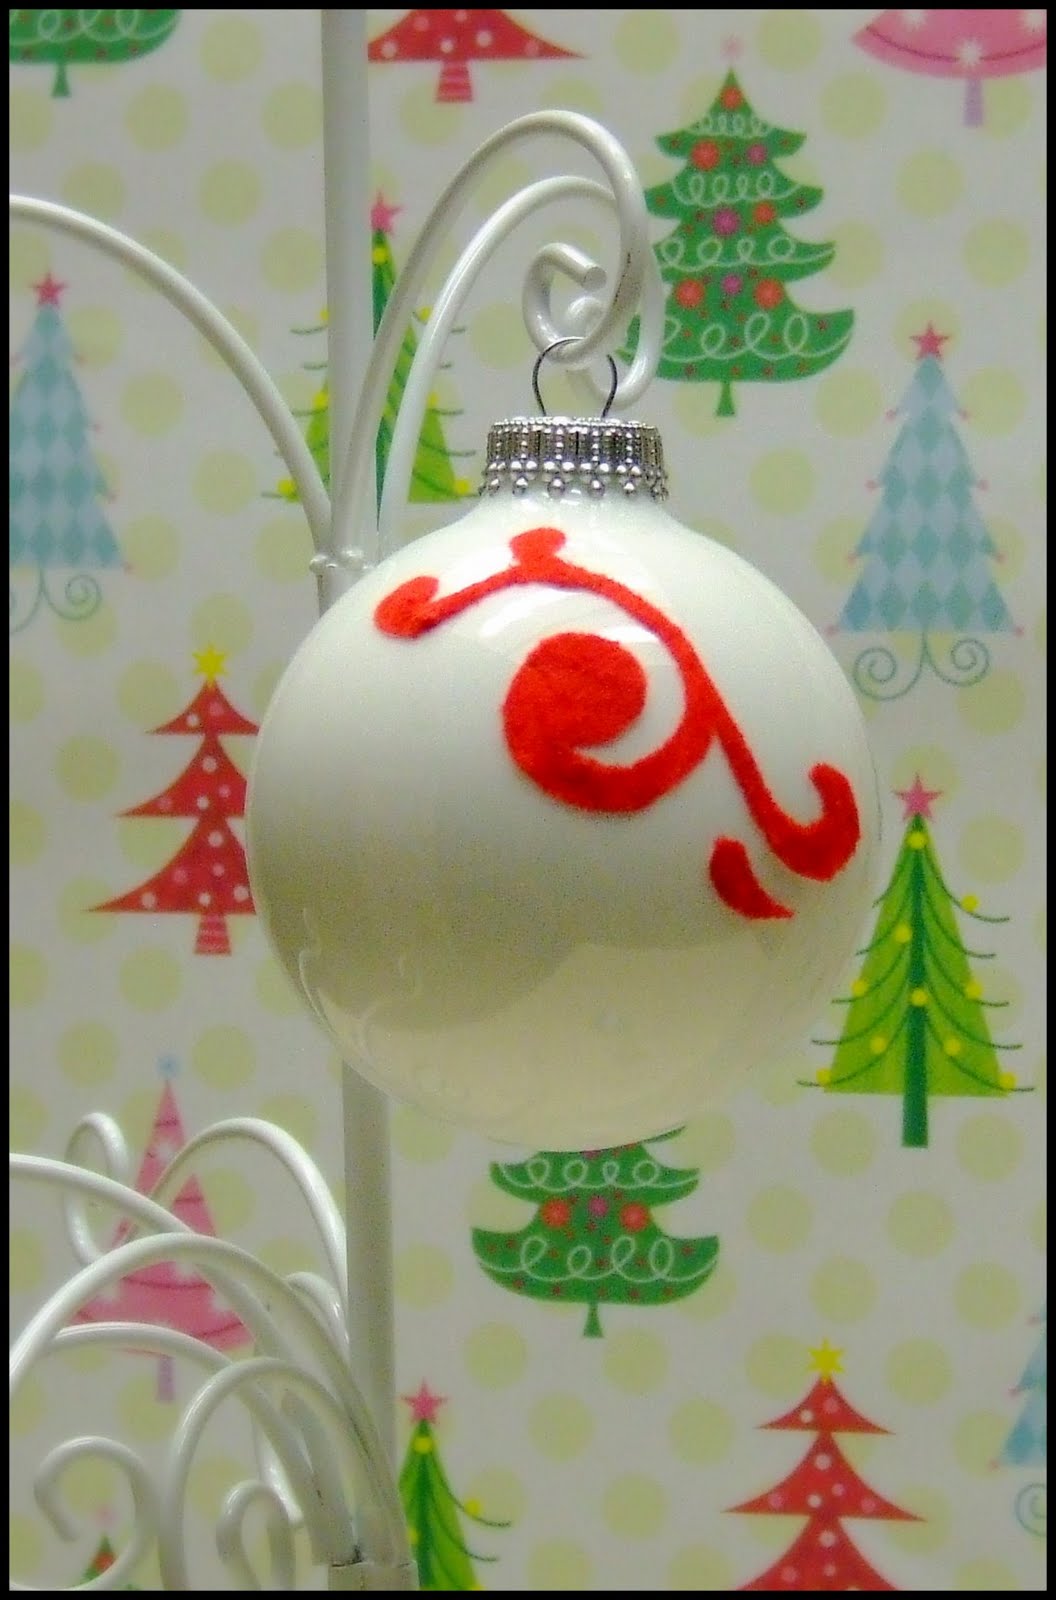
How to Make a Glittery Ornament

You make this the same way as the previously posted flocked ornament.
Get out your Avery sticker paper and cut out the shape you want to use.
Spread an even layer of glue on the paper side.
Sprinkle on the glitter (I used a course glitter and it didn't work that well. I would highly recommend a fine glitter like the ones Martha Stewart sells).
Let dry thoroughly.
Carefully peel off the sticker backing and firmly stick into place on your ornament.
Bah-DAh-Bing- there it is- a lovely, sparkly, ornament for your going- to- be-oh-so- glamorous Christmas tree!
Wednesday, November 18, 2009
Joy To The World Christmas Decoration

This nifty homemade sign will find a home near my nativity scenes this Christmas. Thanks to the new store in town....
Yes, Yippee and a Happy dance! I have found a habitat for humanity restore in my town. LOVE, LOVE, LOVE that store. I was so tempted to buy a gazillion cabinet doors. They are solid wood, with gorgeous trims and only 5$. They just need a little paint and they are ready to hang on your wall. You know, so many ideas- so little time!
I picked out an old cabinet door that looked a bit like this-sorry I forgot to take the before picture. Oops. The one that I picked out had been used and brought in to recycle (so mine only cost $3 and had some character-dings and old paint).
If you want to try your hand at this project here is what you do:
First, spray paint the entire cabinet door cream.
Then stencil on the damask background. Use a light coat of Krylon's Caramel Latte brushed metallic sprayed lightly over a damask stencil (I used my silhouette to make this stencil). Lightly spray paint over the area to avoid runs and drips- this is supposed to be faint.
Next, cover your stencilled area with scrap paper to protect it. Spray paint the cabinet trim with Krylon's oil rubbed bronze brushed metallic spray paint. Now you have a "frame".
While that is drying pick a phrase. I wanted something Christmasy- like "Oh, come let us adore Him" or "Let earth receive her king". I went with "Joy to the World". Use any letter stencils.
Gently sand the damask area and dust off any particles. Then center the lettering stencils and lightly paint with black (I actually used a paint brush and stencilled this step).
Then tenderly sand everything in the cream area and lightly apply antique gel on top around the edges of the cream area.
When the sign is how you want it, finish the project off by giving everything a spray of a clear satin finish.
Let it dry and enjoy your good work!
Monday, November 16, 2009
How to Make Flocked Christmas Ornaments

I saw some unique and super cool flocked Christmas ornaments while web surfing. I'm not sure of the store but if I remember right they were about $20 -too much for me. When it comes to retail prices just call me Ebeneezer!
Seriously, these are are so EASY to make- really, really, easy peasy.
You will need Aleene's quick tacky glue, glass ornaments, Avery sticker paper, and scrapbooking doodlebug design flocking (print yourself a 40% off coupon from Hobby Lobby's website for this purchase- they offer one almost every week!).

Step 1: Make flocked stickers: Cut out your desired sticker shape from the Avery sticker paper.

Step 2: Brush the paper side evenly with tacky glue, sprinkle on flocking. Or put the flocking on a piece of waxed paper and press your gluey sticker into the flocking. Let dry.

Step 3: There will be some white parts still showing. Take a stiff paint brush and dip it into glue then gently pounce/bounce (like you're stencilling) it onto the white areas- dip into flocking again. Let dry and repeat if needed. Don't 'paint' on the second layer of glue or it will smear off the flocking that is already on.
Step 4: When these are truly dry (at least 2 hours) gently peel off the sticker backing and firmly press into place on your ornament. Repeat.
TA-DAH! All done!

Learn from my experimentation: Use a good glue like Aleene's. Don't press the sticky side of the sticker paper into the flocking, because when you try to glue the tiny sticker onto the ornament you will spend forever holding it in place and waiting for it to dry.
Wednesday, November 11, 2009
Dollar Tree Christmas Ornament

I saw these ornaments at Dollar Tree and really liked them except that the manufacturer had been skimpy with the beads. Now that is an easy fix! I just took them home, raided the bead stash, and glued on a bunch more. Now they are ready to sparkle on the tree.
Monday, November 9, 2009
More Burlap and Muslin Christmas Stockings

I'm bored with making Christmas stockings. Yep, my attention span is that short! So, I'll show what I have and move on to other things. These stockings need ironed and a little embellishment at the top- a name embroidered or a cute yo-yo flower and then they will be ready to use. They are made with the same Cath Kidston pattern that was mentioned in the previous stocking post- 
These two are made with burlap and a yard sale found fabric. I sewed each piece of the burlap stocking to muslin to stabilize and minimize fraying. Then I sewed the stocking together. These stockings need a monogram at the top- and maybe a tassel or two. And yes, I had a square toed giant in mind when I made them... not! On to other things!!
Wednesday, November 4, 2009
Spicy Pumpkin Bread with White Chocolate and Cinnamon Frosting

I promise I really am enjoying Fall! I'm not trying to skip Thanksgiving it's just that I try to have all of my Christmas "work" done before December so that I can enjoy the holiday and all of the many family activities that there are. That's my goal anyway! The last two years I haven't done so well. So, this year I'm extra motivated.
I just decorated a tiny corner of the house so that I could take Christmasy pictures- and share with you this years crafts- in case some of you like to get things done before the rush of the holidays too. Really and truly it is still Fall at my house- mostly :o)
"Spicy Pumpkin Bread with White Chocolate and Cinnamon Frosting"-Doesn't this recipe sound amazing?! Sorry, but it wasn't. The pumpkin bread was wondeful- but the frosting was too sweet. I used this yummy pumpkin bread recipe .
Monday, November 2, 2009
Burlap and Muslin Christmas Stockings

I received my winter Ballard Design catalogue last week and they had some charming burlap Christmas stockings. Of course, I had to come up with my own version. I had lots of fun with this rustic, back to nature, kind of theme.
I made my own "fabric" by stamping Martha Stewart butterfly stamps and brown ink on a rustic looking muslin- (I purchased this little tree stamp at Michaels last year and unfortunately I don't remember who made it).
I looked all over the internet trying to find a stocking pattern that I liked. I found this little one at McCall's. Then I took this large Cath Kidston pattern and adapted it- by making the leg skinnier.
I printed the bird right onto the muslin the same way I did this earlier project. The bird image is from Vintage Moth.
I kinda like the look of mixing the fancy trim with the humble muslin- as on the little butterfly sock. You could use gold ink if you really wanted to spiff things up- - - so many options. more stockings to come.
Crocheted Christmas Ornaments
Don't you just love Sundays?! It is so great to worship with others and to refocus on what is really important- I feel refreshed and ready for another week.
Since I start decorating for Christmas on the day after Thanksgiving I'll start sharing my Christmas ideas now. I have schizophrenic tastes- so, there will be quite a variety. I just received my winter Ballard Designs catalogue and now I want to make everything in there.... anywho, here is an easy project.
I was going to crochet a cover for each styrofoam ball... but a chain stitch is so much quicker for my novice crocheting skills. I just did a long chain stitch and hot glued it to a styrofoam ball- use your low temperature glue gun because you will burn your fingers. Ouch and double ouch!
 To change colors I tied a knot and started gluing on another color. Variegated yarn makes for a nice look, too.
Friday, October 30, 2009
Embroider a Jaunty Crow

This jaunty little crow is speedy to whip up. I made a few versions- on the little ones I used iron on fusible web to attach the little plaid wing- on the larger ones I actually stitched on the applique. His inspiration is somewhere on the web- there are so many birdie crafts out there- I'm not sure what started me working on this exact project- but thanks to all for the inspiration!
Thursday, October 29, 2009
Recent Thrifting

A few weeks ago dear hubby made a special call to let me know about the upcoming Texas Size Yard Sale-Yes, yes, yes! Last year I missed it. I was traumatized.
This sale is held in a building about the size of WalMart and the prices are incredible. Everything is donated and the proceeds go to fund meals on wheels (a charity that takes meals to home bound folks).
I was hoping for a serger and since I was the second person in line (yes, I was there 2 HOURS early). I was the first one into the sewing area. But alas, they did not have one this year... I still came home with a few deals though. A juicer for $3 that we have tested on carrots and it works! An American Harvest Food Dehydrator (new for about $140). My cost: $5. These are great for making jerky in! And the big winner- because we really needed it: A gas edger- for our lawn- new about $200. My cost: $40. Our yard has never looked so good!
Can't wait 'til next year!
Wednesday, October 28, 2009
Product Review, Scent Diffusers

I stopped by my local Bath and Body Works and they were having a great sale on these home fragrance scent diffusers- I purchased four. Over the past several months I have tried sweet pea, cherry blossom, cinnamon and cinnamon & clove buds.
I have mixed feelings. I LOVE the scents, they really smell wonderful- but the smell is so strong that for the first four weeks I have to banish them to a back room and they still nearly knock me over!
Oh, and hide them behind furniture because if kids pull them out and tip them over the liquid spills everywhere. Next time you are in their store at least stop and get a whiff- then you'll be able to decide if they are right for you.
Tuesday, October 27, 2009
Halloween Flick

Alrighty, if you are a Jane Austen, BBC, fan and you hate gory scary stories you might want to watch the 1983 BBC mini series of Jane Eyre this Halloween. It has a little mystery mixed in with the romance and a woman who triumphs over adversity and temptation.
This version stars Timothy Dalton and Zelah Clarke. There are eleven episodes- so set aside a couple of evenings or an all day marathon. I watched it through Netflix on demand. I give it five stars.
Monday, October 26, 2009
Great Day
I woke up this morning to cool perfection- just right for snuggling under the covers. Now big fat raindrops are plopping all over my world- it sounds great and it smells damp and wonderful. Don't you just love the secure feeling of home, a warm cocoon, when it is stormy outside?! Blessings abound -my husband has a job to go to- the car starts- and Christmas music plays on the radio. Brown sugar oatmeal for breakfast and delicious left over hamburger soup for lunch- life is good.
A Halloween Flashback- last year's Halloween tree that sometimes looks black and glittery and sometimes looks silver-
Hope your day is full of love and blessings, too!
Wednesday, October 21, 2009
Halloween Twig Tree

I may be the last one to make one of these, but here is my version of the twig tree.
After beating the pine tree out front with a broom handle (Don't feel bad for the tree- it retaliated by showering me with sappy dusty tree bits)! I gathered up a few branches. My tree must be genetically challenged because it didn't provide me with anything perfectly symmetrical!
Anyways, I had to duct tape together three sticks and it still is lopsided- but don't look at that. Instead of using generic black I spray painted mine with Krylon's oil rubbed bronze metallic paint- I really like how that looks! Then I used a package of small pumpkins from Hobby Lobby ($2) and these left over charms from last years project and stuck them in a thrift store vase that I painted black. I finished it off with dollar tree ribbon. So, for three dollars and some leftovers I have my twig tree.
Subscribe to:
Posts (Atom)


